
The Ultimate Homemade Chocolate Swiss Roll: A Slice of Heaven
Rolling into the weekend with a craving for something decadent and delightful? Look no further than this ultimate Chocolate Swiss Roll recipe. This isn’t just any Swiss roll; it’s a symphony of rich, fluffy chocolate cake swirled around a cloud of whipped cream, a treat that’s as impressive to look at as it is to devour. Picture a golden-brown, perfectly rolled cake, dusted with powdered sugar and just begging to be sliced. Trust me, this dessert is destined to become a family favorite, perfect for birthdays, holidays, or simply a sweet ending to any day. My journey with this particular Chocolate Swiss Roll began in my grandmother’s kitchen, where the aroma of baking chocolate always filled the air. She had a knack for making even the most intricate desserts seem effortless, and her Swiss roll was legendary. This recipe, inspired by her baking wisdom and infused with my own touch, is a tribute to those cherished memories and a promise of sweet moments to come. Get ready to roll up your sleeves and create a Chocolate Swiss Roll masterpiece!
Why This Recipe Works
- Foolproof Technique: Even if you’re a baking novice, this recipe is designed for success. The steps are clear, concise, and easy to follow.
- Decadent Flavor: The rich chocolate cake paired with the light and airy whipped cream filling creates a truly irresistible combination.
- Showstopper Dessert: This Chocolate Swiss Roll is guaranteed to impress your guests. Its elegant spiral design makes it a beautiful centerpiece for any occasion.
- Versatile Treat: Enjoy it as is, or get creative with variations like adding fresh berries, a dusting of cocoa powder, or a drizzle of chocolate ganache.
- Makes Memories: Baking this Swiss roll is a wonderful way to create lasting memories with loved ones, just like I did with my grandmother.
- Freezes Beautifully: Make ahead and freeze for later enjoyment. Perfect for those busy weeknights when you crave a touch of sweetness.
Ingredients
- For the Cake:
- 6 large eggs, at room temperature
- ¾ cup granulated sugar
- 1 teaspoon vanilla extract
- ¾ cup all-purpose flour
- ½ cup unsweetened cocoa powder
- ¼ teaspoon baking powder
- ¼ teaspoon salt
- For the Filling:
- 1 cup heavy cream, chilled
- ¼ cup powdered sugar
- ½ teaspoon vanilla extract
Step-by-Step Instructions
1. Preparing the Oven and Pan:
Preheat your oven to 375°F (190°C). Line a 10×15 inch jelly roll pan with parchment paper, leaving an overhang on the short sides. This overhang will be your handles for lifting the cake later. Grease the parchment paper lightly. This ensures a clean release and prevents the Chocolate Swiss Roll from sticking.
2. Whipping the Eggs and Sugar:
In a large bowl, beat the eggs and granulated sugar together using an electric mixer on high speed until the mixture is pale yellow and thick. This step is crucial for creating a light and airy cake. You’ll know it’s ready when the mixture ribbons off the beaters when lifted. See the transformation from separated ingredients to a fluffy, unified batter in our image.
3. Adding the Dry Ingredients:
In a separate bowl, whisk together the flour, cocoa powder, baking powder, and salt. Gradually add the dry ingredients to the wet ingredients, folding gently with a spatula until just combined. Be careful not to overmix, as this can result in a tough cake.
4. Baking the Cake:
Pour the batter into the prepared pan and spread evenly. Bake for 12-15 minutes, or until the cake springs back lightly when touched in the center. Overbaking will make the cake dry and difficult to roll. A perfectly baked Chocolate Swiss Roll will have a beautiful golden-brown hue.
5. Cooling and Rolling the Cake:
While the cake is still warm, gently invert it onto a clean kitchen towel dusted with powdered sugar. Carefully peel off the parchment paper. Starting from one of the short ends, tightly roll the cake along with the towel. This helps the cake retain its shape as it cools. Let the rolled cake cool completely.
6. Preparing the Whipped Cream Filling:
In a chilled bowl, beat the heavy cream with an electric mixer on medium speed until soft peaks form. Gradually add the powdered sugar and vanilla extract, continuing to beat until stiff peaks form. Don’t overwhip the cream, or it will become grainy.
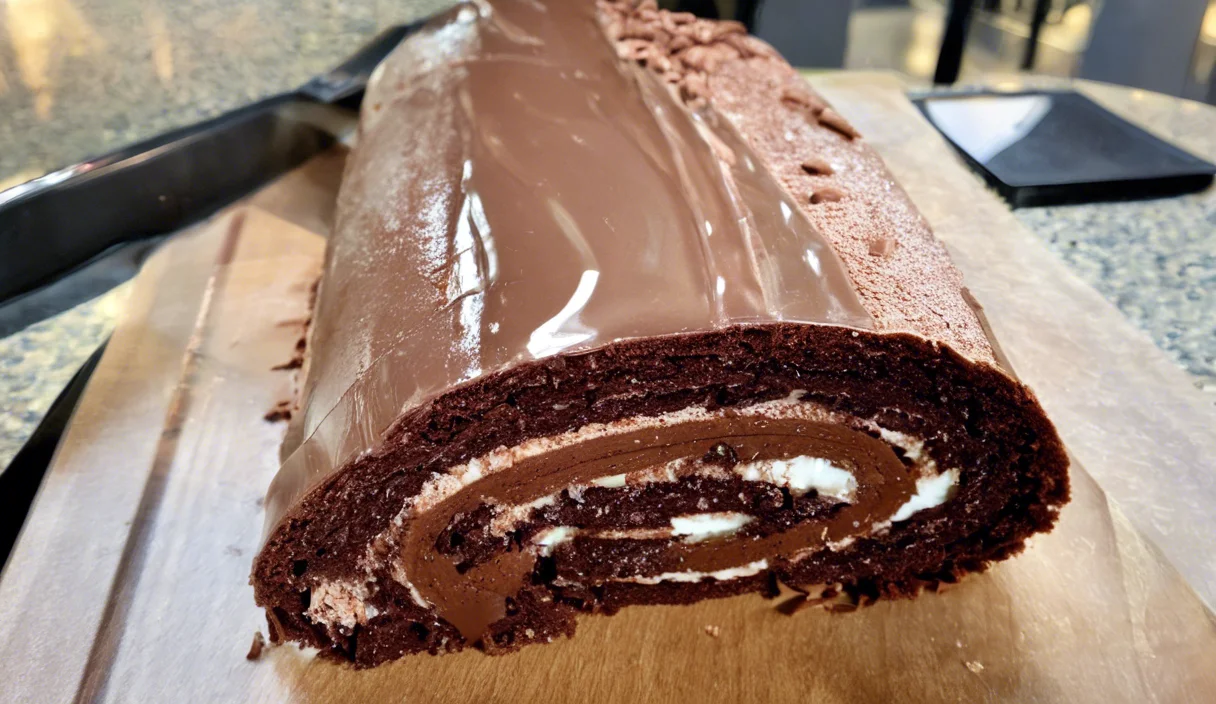
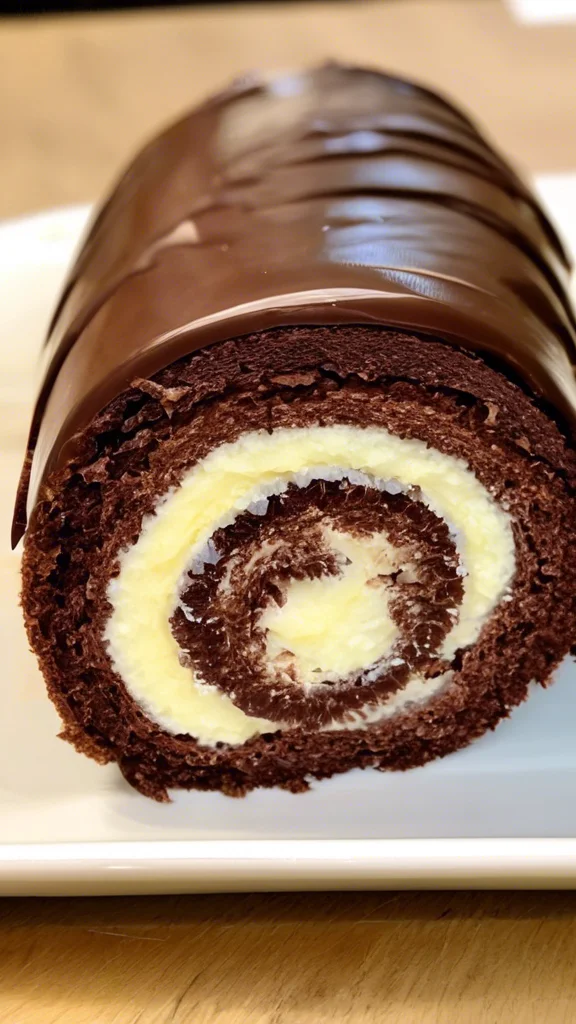
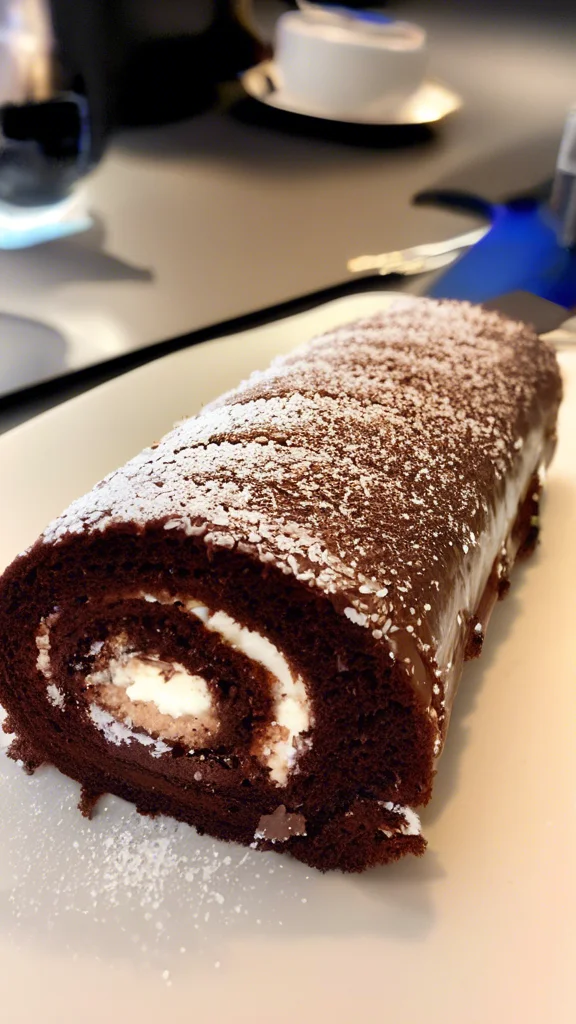
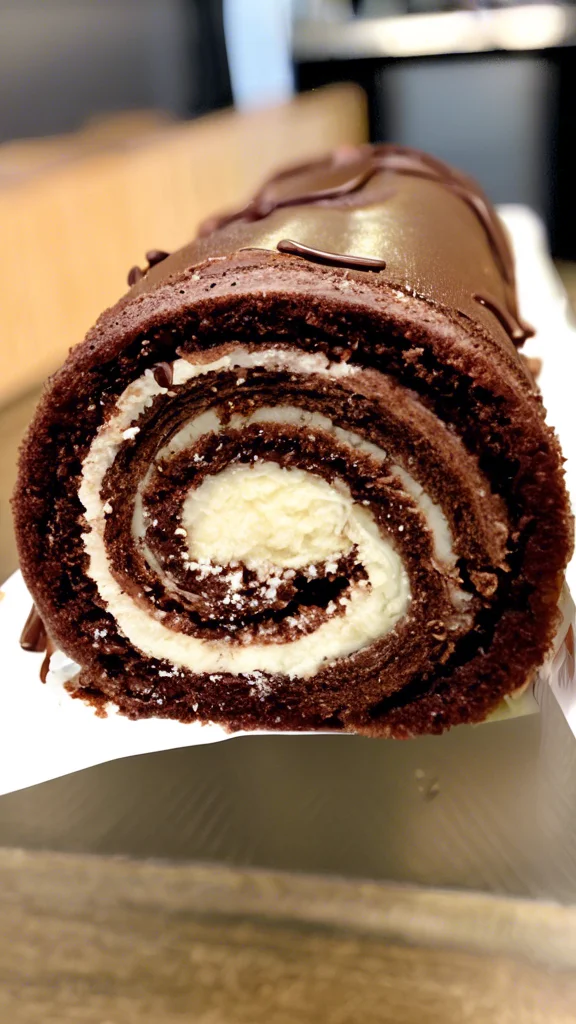
7. Assembling the Chocolate Swiss Roll:
Once the cake is completely cool, carefully unroll it. Spread the whipped cream filling evenly over the cake, leaving a small border at the edges. The image showcases how beautifully the cream nests within the rolled chocolate cake.
8. Rolling and Finishing:
Starting from the same short end as before, tightly roll the cake without the towel. Place the Chocolate Swiss Roll seam-down on a serving platter. Dust with powdered sugar or cocoa powder, if desired. You can also garnish with fresh berries or chocolate shavings.
Maddy’s Tips for Success
- Room Temperature Eggs: Using room temperature eggs helps them incorporate more air into the batter, resulting in a lighter, fluffier cake.
- Don’t Overmix: Overmixing the batter can develop the gluten in the flour, leading to a tough cake. Mix until just combined.
- Parchment Paper Overhang: The parchment paper overhang makes it easy to lift the cake out of the pan and prevents it from sticking.
- Rolling While Warm: Rolling the cake while it’s still warm helps it maintain its shape and prevents cracking.
- Cool Completely: Ensure the cake is completely cool before adding the filling to prevent the whipped cream from melting.
- Even Filling: Spread the filling evenly to create a consistent swirl throughout the Chocolate Swiss Roll.
- Chill Before Serving (Optional): Chilling the finished Swiss roll for about 30 minutes helps the flavors meld and makes it easier to slice.
Recipe Variations
- Berry Bliss: Add fresh raspberries, strawberries, or blueberries to the whipped cream filling for a burst of fruity flavor.
- Mocha Magic: Incorporate a tablespoon of instant espresso powder into the cake batter for a mocha-flavored Chocolate Swiss Roll.
- Nutty Delight: Sprinkle chopped hazelnuts or almonds over the whipped cream filling before rolling for added texture and flavor.
Serving Suggestions
- Enjoy a slice of Chocolate Swiss Roll with a cup of coffee or tea for a delightful afternoon treat.
- Serve it as a dessert after a special dinner.
- Pack individual slices for a sweet picnic or lunchbox surprise.
Join the Conversation
I’d love to hear about your Chocolate Swiss Roll adventures! Share your photos and baking experiences in the comments below. Did you try any of the variations? What are your favorite serving suggestions? Let’s connect and inspire each other in the kitchen!
Conclusion
Baking this Chocolate Swiss Roll is a truly rewarding experience. From the moment the rich aroma of chocolate fills your kitchen to the first decadent bite, it’s a journey of pure bliss. I hope this recipe brings as much joy to your kitchen as it does to mine.
Frequently Asked Questions
- Can I make the Chocolate Swiss Roll ahead of time? Yes, you can bake the cake and prepare the filling a day ahead. Store them separately in the refrigerator and assemble the Swiss roll just before serving.
- How do I store the Chocolate Swiss Roll? Store the assembled Swiss roll in an airtight container in the refrigerator for up to 3 days.
- Can I freeze the Chocolate Swiss Roll? Yes, you can freeze the assembled Swiss roll for up to 2 months. Wrap it tightly in plastic wrap and then in aluminum foil before freezing. Thaw overnight in the refrigerator before serving.
- What can I substitute for heavy cream? You can use whipped topping as a substitute for heavy cream, but the flavor and texture will be slightly different.
- My cake cracked when I rolled it. What did I do wrong? The cake might have been overbaked, making it dry and prone to cracking. Ensure you don’t bake it for longer than the recommended time and roll it while it’s still warm.
- Can I use a different size pan? Using a different size pan will affect the baking time and the thickness of the cake. Adjust the baking time accordingly.
- My whipped cream is runny. What happened? The cream might not have been cold enough, or it might have been overwhipped. Ensure the cream and bowl are chilled before whipping. Stop whipping as soon as stiff peaks form.